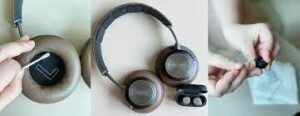
Headphones are an essential accessory for many, whether you’re using them for work, entertainment, or fitness. However, over time, the ear pads on your headphones can accumulate dirt, sweat, oils, and bacteria. Not only can this impact sound quality, but it can also lead to unpleasant odors and potential skin irritation. Cleaning your headphone pads regularly is essential to maintain hygiene, extend their lifespan, and ensure optimal performance. In this guide, we’ll walk you through the process of cleaning headphone pads effectively and safely.

Why Cleaning Headphone Pads is Important
Before diving into the cleaning process, it’s worth understanding why it’s crucial to keep your headphone pads clean:
- Hygiene: Regular use leads to the buildup of sweat, oils, and dead skin cells. Over time, this can harbor bacteria and fungi, posing a health risk.
- Longevity: Dirt and oils can degrade the material of the pads, causing them to wear out faster.
- Sound Quality: Debris and grime can affect the acoustic properties of your headphones, diminishing the listening experience.
- Aesthetics: Clean headphones simply look better and are more pleasant to use.
Materials You’ll Need
Before starting, gather the following materials:
- A soft, lint-free cloth
- Mild dish soap or a gentle detergent
- Warm water
- Isopropyl alcohol (70% concentration or higher)
- Cotton swabs
- A small bowl
- A soft-bristled toothbrush (optional)
- Microfiber cloths
Step-by-Step Cleaning Process
Follow these steps to clean your headphone pads thoroughly:
1. Remove the Pads (if possible)
Most headphone pads are detachable, making them easier to clean. Refer to the manufacturer’s instructions to remove them without causing damage. If they’re not removable, you can still clean them, but you’ll need to be more cautious.
2. Dust and Debris Removal
Start by gently brushing off loose dust and debris using a soft-bristled toothbrush or a dry microfiber cloth. This step ensures that you’re not grinding dirt into the material during cleaning.
3. Prepare a Cleaning Solution
Mix a small amount of mild dish soap or gentle detergent with warm water in a bowl. Avoid using harsh chemicals, as they can damage the material of the pads.
4. Wipe Down the Pads
Dip the lint-free cloth into the soapy solution, wring out excess water, and gently wipe the surface of the pads. Pay extra attention to areas with visible dirt or stains. Avoid soaking the pads, as excessive moisture can seep into the foam and damage them.
5. Disinfect with Isopropyl Alcohol
For an added layer of cleanliness, use a cotton swab dipped in isopropyl alcohol to disinfect the pads. This step is particularly useful for removing bacteria and odors. Ensure that the alcohol concentration is at least 70% for effective disinfection.
6. Dry Thoroughly
After cleaning, use a dry microfiber cloth to remove excess moisture. Allow the pads to air dry completely in a well-ventilated area. Avoid exposing them to direct sunlight or using a hairdryer, as excessive heat can warp or degrade the material.
7. Clean the Headphone Frame
While the pads are drying, clean the rest of the headphone frame. Use a damp cloth to wipe down plastic or metal parts and a cotton swab for hard-to-reach areas. For leather or synthetic materials, consider using a leather conditioner to maintain their texture and appearance.
8. Reattach the Pads
Once the pads are completely dry, reattach them to the headphones. Ensure they are securely in place to prevent them from shifting during use.
Tips for Different Types of Headphone Pads
Different materials require slightly different care:
- Leather or Faux Leather: Use a leather cleaner or conditioner to prevent cracking and maintain suppleness.
- Foam: Avoid soaking foam pads, as they are highly absorbent and can retain moisture.
- Velour: These pads can often be machine-washed in a gentle cycle, but always check the manufacturer’s guidelines.
Preventative Maintenance
To minimize the need for frequent deep cleaning, adopt these preventative measures:
- Store Properly: Keep your headphones in a case or on a stand when not in use to prevent dust accumulation.
- Wipe Regularly: After each use, wipe down the pads with a dry microfiber cloth to remove sweat and oils.
- Use Protective Covers: Consider using washable covers for your headphone pads, especially if you use them during workouts.
- Avoid Sharing: Sharing headphones can transfer bacteria and oils, increasing the need for cleaning.
When to Replace Headphone Pads
Despite regular cleaning, headphone pads will eventually wear out. Replace them if you notice:
- Persistent odors that cleaning doesn’t eliminate
- Cracks, peeling, or flaking material
- Loss of cushioning or comfort
Most manufacturers sell replacement pads, or you can find third-party options that are compatible with your headphones.
Conclusion
Keeping your headphone pads clean is a simple yet essential task that ensures hygiene, comfort, and optimal performance. By following the steps outlined in this guide and adopting preventative maintenance practices, you can extend the life of your headphones and enjoy a superior listening experience. Regular cleaning not only benefits you but also preserves the investment you’ve made in your audio equipment.